Designer Guide
Anyone with knowledge of CSS and image manipulation can create a new theme for PrestaShop.
We recommend using the following tools:
- Firefox: Firebug for easy comparison and debugging between your CSS and the output.
- Firefox/Chrome: Web Developer adds many handy web developer tools to your browser.
- Safari/Chrome: enable the Web Inspector.
- Opera: Dragonfly, a fully-featured debugging environment.
- Internet Explorer 8+: Developer Tools are available through the Tools menu.
Internet Explorer can make use of Firebug lite.
Creating a new theme
Follow the following steps below to create a new theme for PrestaShop.
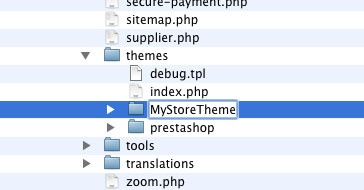
1. Copy the default theme
- Locate the
../themesdirectory in your PrestaShop install, and create a copy of the default../themes/prestashop/directory. - Rename the duplicate.
2. Modify the CSS sheet
- In the new theme folder (e.g.,
../themes/MyStoreTheme/), locate the/cssfolder. - Open the
global.cssfile and modify it according to your needs. This is you are only limited by your creativity – and your knowledge of CSS.
Note: themaintenance.cssfile, located in the same folder, controls the layout of the Maintenance Mode page. - New or modified images must be placed in the new theme's
/imgfolder (e.g.,../themes/MyStoreTheme/img).
Tips from the PrestaShop development team
- Where possible, use CSS instead of HTML (e.g., only use tables for tabular data, not for layout).
- Validate your XHTML and CSS code using the W3C tools: HTML validator, CSS validator.
- Reduce images and pictures size by using compression
- Test your theme on several Web browsers, not only Internet Explorer. Firefox, WebKit browsers (Safari, Chrome) and Opera are all to be considered, but you should most of all check that it works well the browsers your website is mostly visited with. If your website has not launched yet, have a look at your country browser stats. For instance, here are the browser stats for France, from 2010 to 2011.
- Keep filenames in lowercase.
- Remember that the homepage text and logo are modifiable directly via the Back Office. Go to Back Office >> Modules >> Home text editor and click Configure.
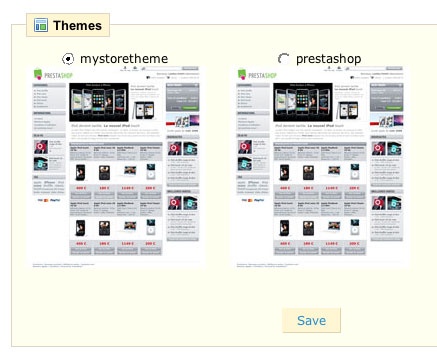
3. Create a preview screen shot
Once your theme is ready, you must place a file representing the theme, called preview.jpg, in the theme’s root folder (e.g., ../themes/MyStoreTheme). This file must be a 100 × 100 pixels .jpg file.
4. Test your theme
- Go to Back Office >> Preferences >> Appearance >> Themes section.
- Select the new theme and click Save..
Share your themes!
Show off your hard work, get feedback, and build your reputation by sharing your theme in the Themes section of our Forum!
You can also sell theme to PrestaShop users through our Addons website!
Integration: where the hooks and modules are
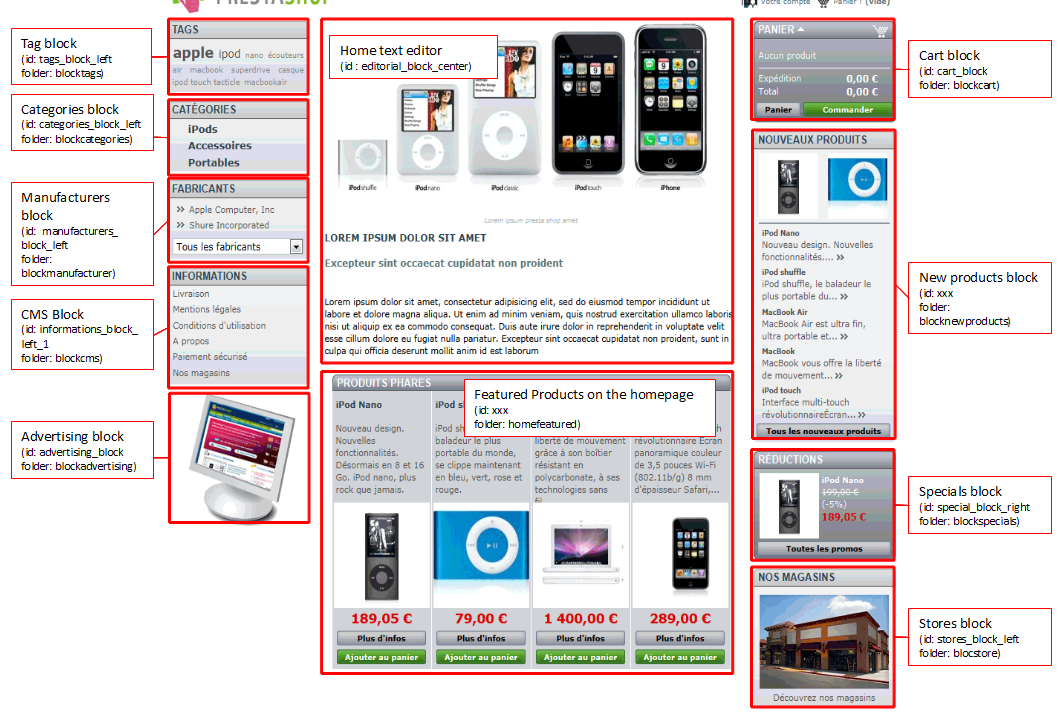
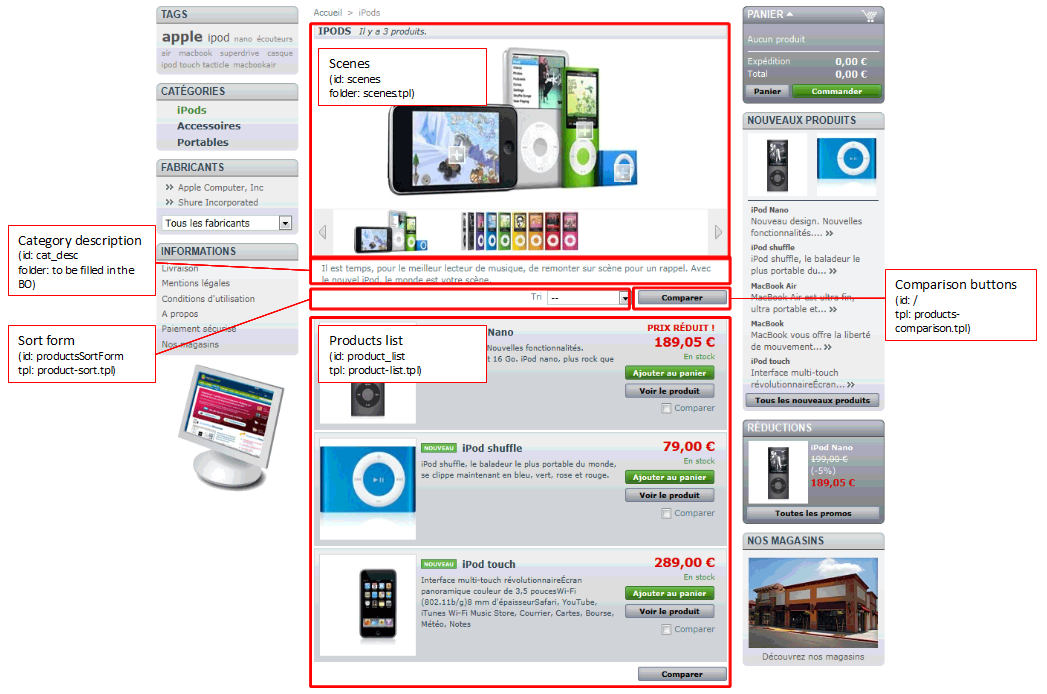
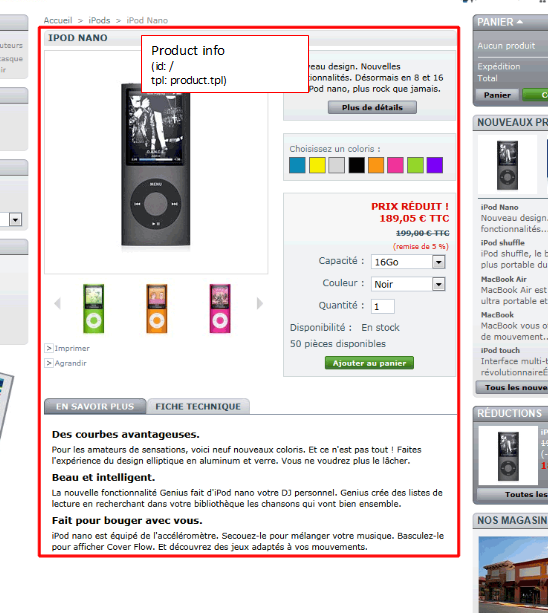
One of the key point of integrating content within a PrestaShop theme is to know where said content is displayed, and therefore where the various hooks and modules are located.
Here is a graphical representation of where they are, for each page. You will find:
- The name of the block.
- The block's id, in order to target it with CSS.
- The block's folder or template file, if you need to make changes to it.
Hooks
Main content areas
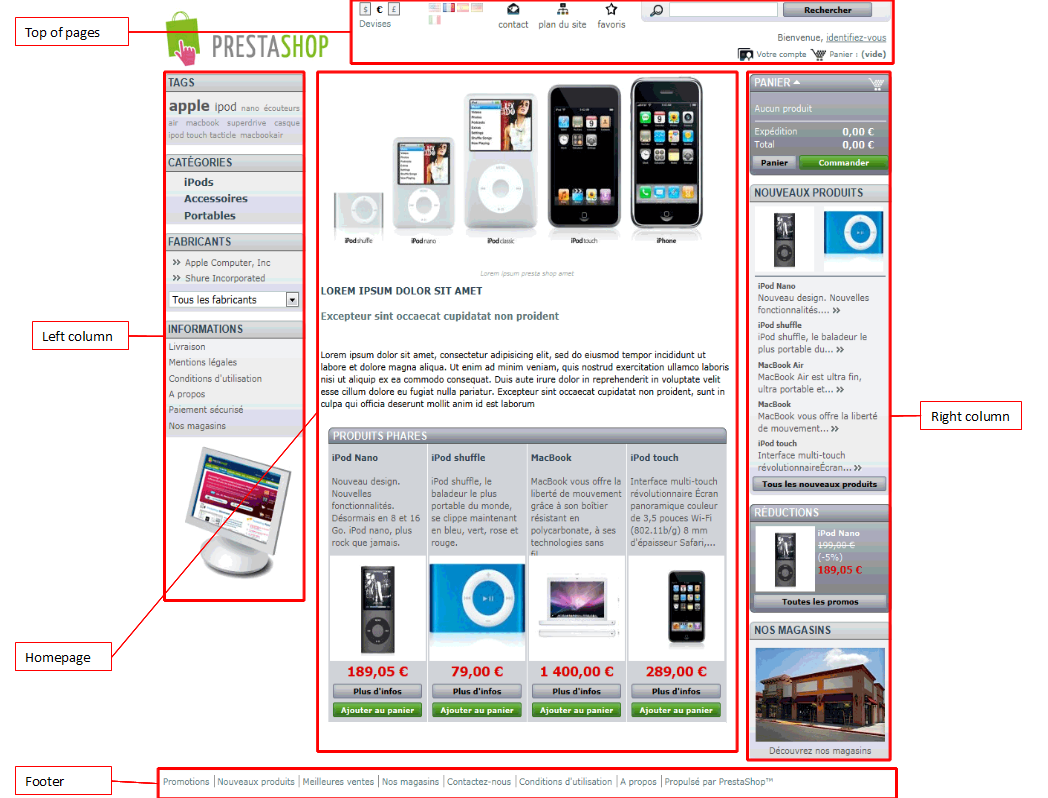
Header section

Homepage blocks
Category central column
Modules
Product page
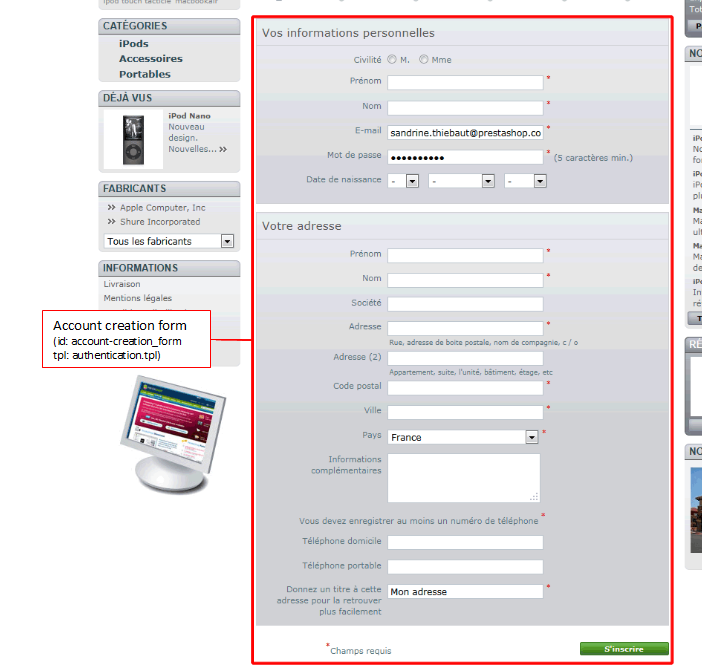
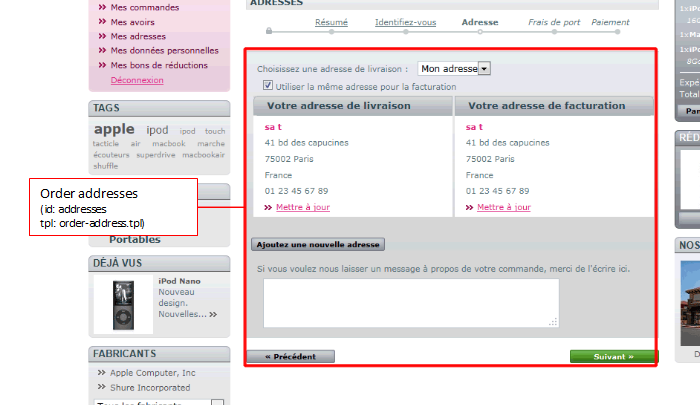
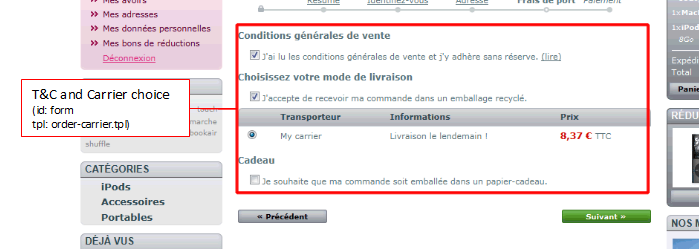
Account forms & order steps
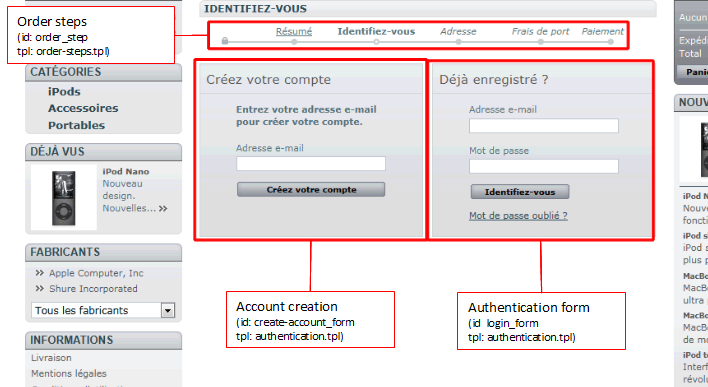
Account creation form
Order blocks
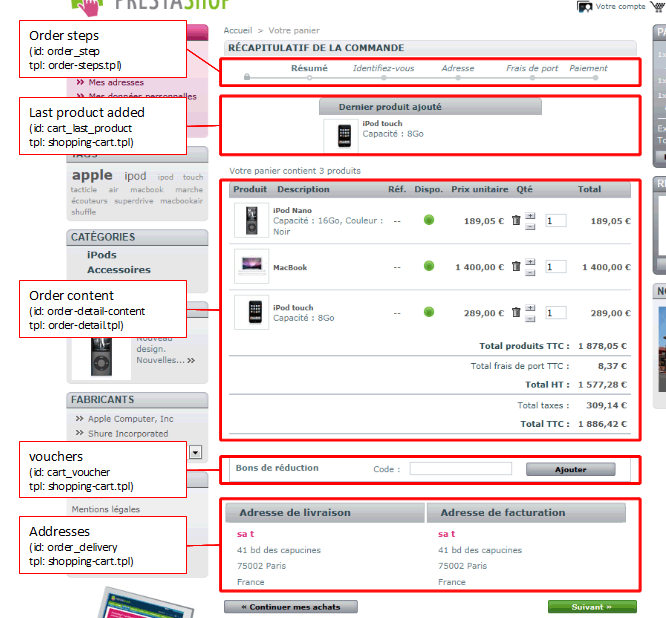
Addresses
Terms & Conditions and carrier choice
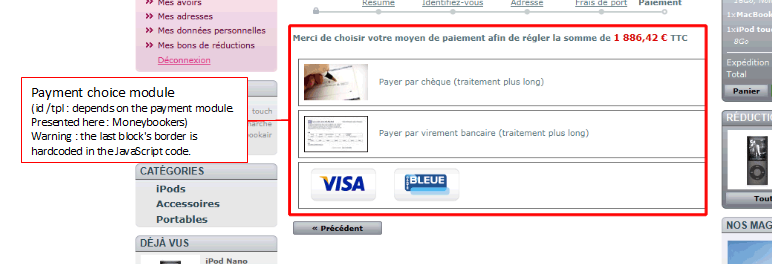
Payment module choice
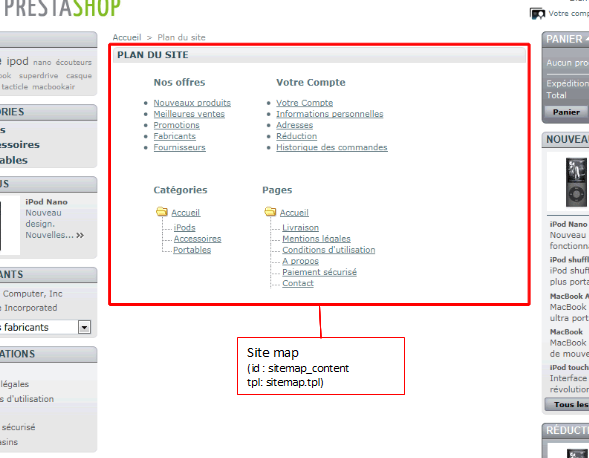
Site map
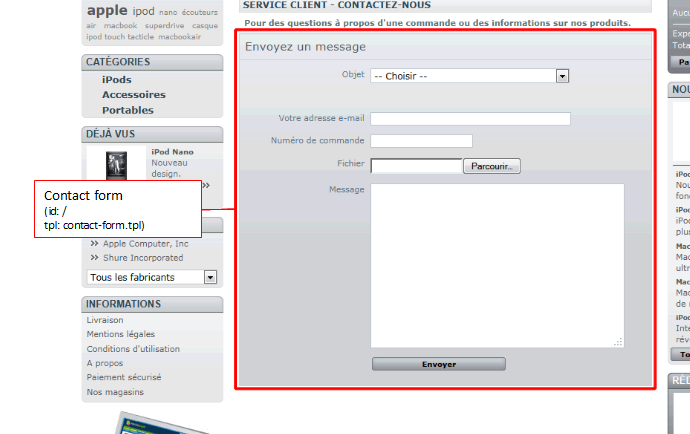
Contact form
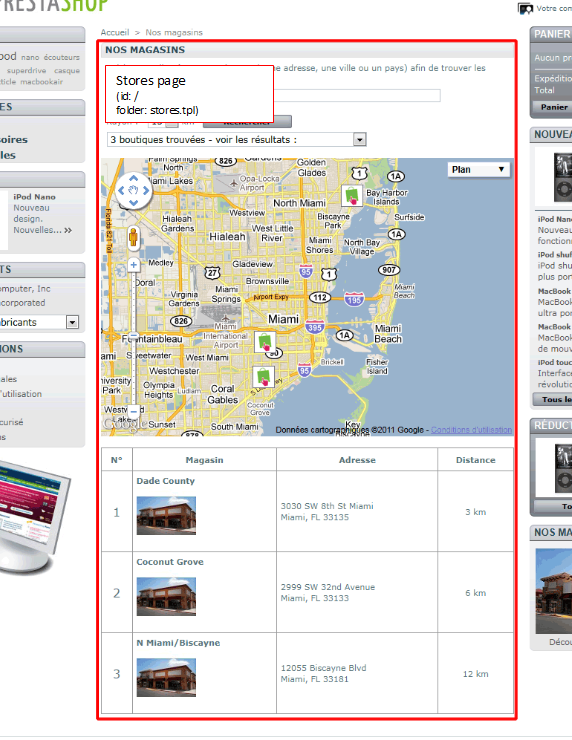
Stores page