...
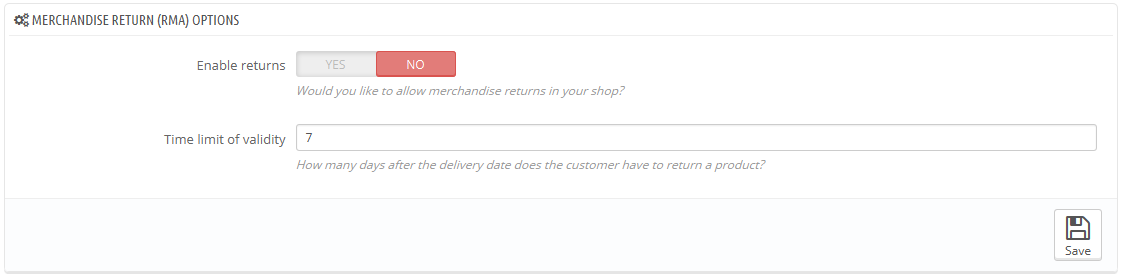
At the bottom of the page, you have the possibility of enabling customers to send products back to you ("Enable returns" option). Simply make a choice, indicate the number of days during which a return request can be made, and save your settings: customers now have the ability to ask for a return authorization.
Return process: how the customer sees it
...
- Access the "Orders History" section of his or her account.
- Select the order from which he wants to return an item.
- Select the product(s) that s/he wishes to return by checking the box next to its name(s).
- (optional) Add an explanation, in order for the shop team to better understand why the customer wants to return this product.
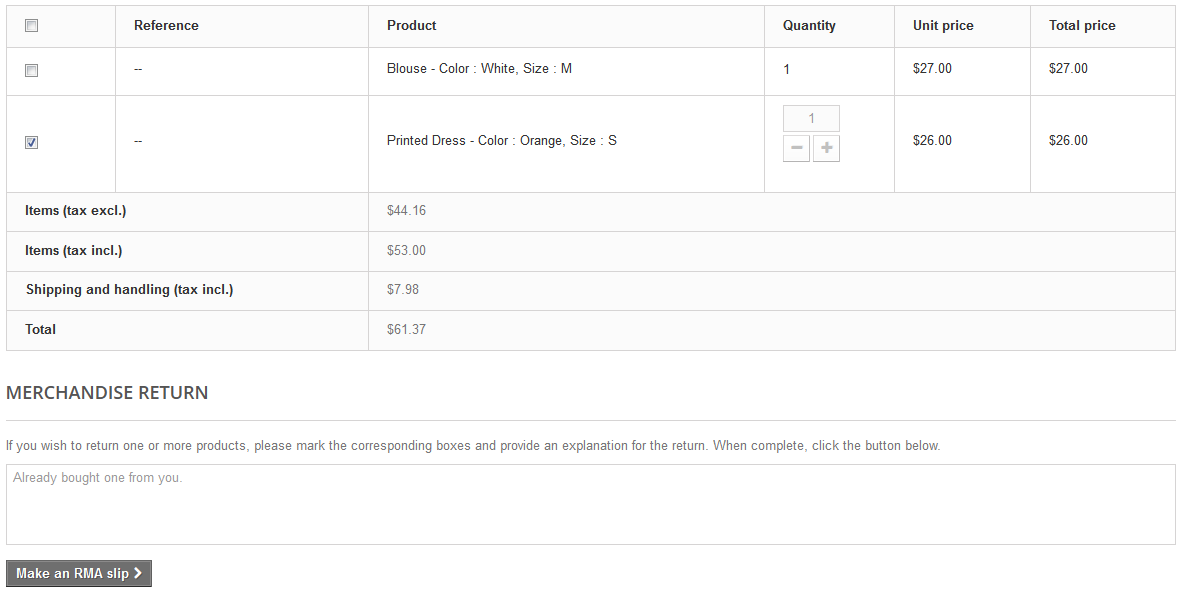
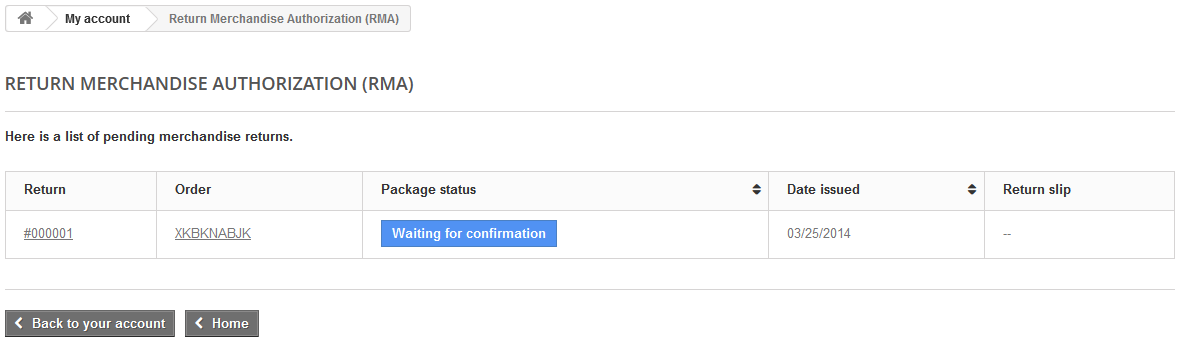
Once the form is complete, the customer clicks on "Make an RMA slip", and the request is sent to the store manager (you). The request appears as "Waiting for confirmation" in the customer's "Return Merchandise Authorization" page, accessible from the account page.
Return process: how you see it
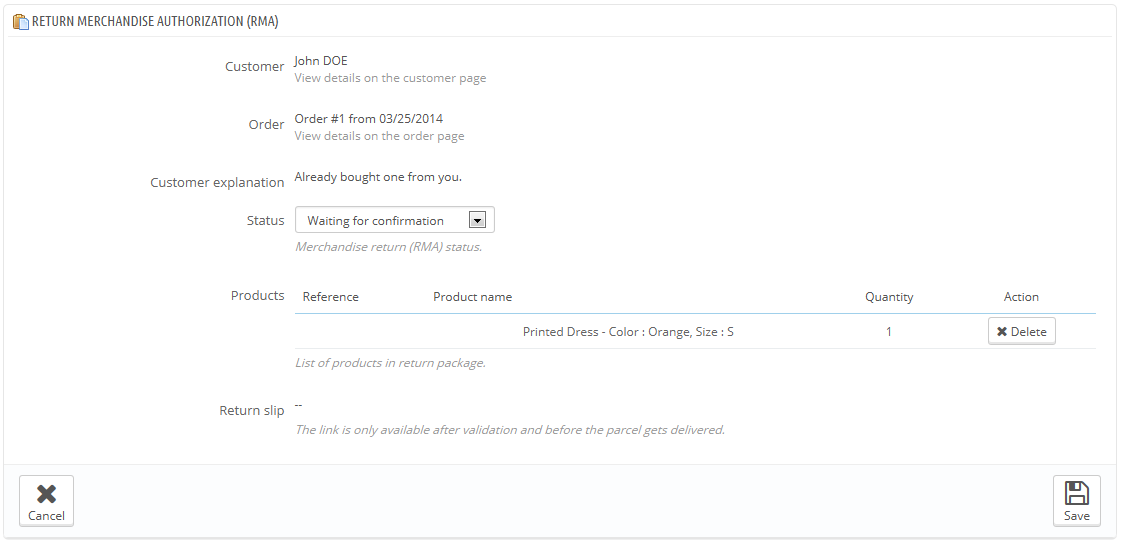
The return request appears in your back-office.
It is now up to you to accept it or deny it:
...
At first, the RMA has the "Waiting for confirmation" status.
...

The refund process can take several steps, which are indicated by the RMA status. There is just a handful of statuses, which can follow the whole RMA process:
- Waiting for confirmation.
- Waiting for package.
- Package received.
- Return denied.
- Return completed.
It is now up to you to accept it or deny it:
- Click on the name of the return request to see more details.
- Change the status to continue with the return process or stop it.
If you want to stop the return process (and deny the customer a refund), simply choose the "Return denied" status.
If you agree with the product being returned and the customer being refunded, follow each step precisely:
- Choose the next step in the process: "Waiting for package". This will send an e-mail to the customer indicating that the product can be sent back to you.
- Once you have received the package, change the RMA's status to "Package received".
- Finally, once the whole process is over (either the customer has been refunded or you have issued a credit slip), change the RMA's status to "Return completed".
- Validate.
Refunding a customer
An order can be refunded, either partially or totally. This is done using two actions buttons located in the top bar of the order's page itself rather than in the RMA page.
...
| Info |
|---|
Product return is not activated by default. To activate it, go to the "Product returns" page under the "Orders" menu, and activate the option in the option section at the bottom of the page. This will apply to all products and all orders. |
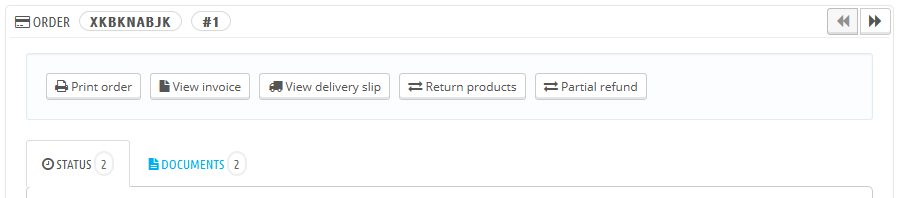
- Return products. To be used only when the customer has effectively returned products: once the returned product has been received, you can mark it as returned directly in the order form. Click the "Return products" button and a new column will appear in the product list, titled "Return". Check the box of the affected products, indicate the quantity of items that were returned, and click the "Return products" button at the bottom of the table.
- Partial refund. To be used when you need to refund only part of the order and not the whole order, either because the customer returned the ordered product, or simply as a sign of goodwill for a damaged product that the customer chose to keep anyway. Click the "Partial refund" button and a new column will appear in the product list, titled "Partial refund". Set the amount an and quantity for each of the affected products, choose one of the option at the bottom of the list (see below), and click the "Partial refund" button at the bottom of the table.
...