...
Before you get started, make sure you have all the requirements available: server space at a hosting provider, domain name, FTP client, text editor. Makes sure to follow the instructions in the "What you need to get started" page first: http://doc.prestashop.com/display/PS15/What+you+need+to+get+started.
| Tip |
|---|
Some web-hosts Our official web hosting partner 1&1 offer a 1-click install in order to save you time and get you started even faster. Using these can drastically reduce the installation time for inexperienced users. Those web-hosts mostly use the following script libraries:
Using these can drastically reduce the installation time for inexperienced users. Some of these scripts even support 1-click update, which is invaluable. Other hosts have their own installation scripts. Check with your own host for more information. Last but not least, PrestaShop has its own hosting solution: by registering on PrestaBox, you offload all the technical hurdles of hosting to our own team, and can focus on your shop, clients and sales. Visit https://www.prestabox.com/ for more information. |
...
- Download the PrestaShop archive and unzip it on your computer.
- Create a database for PrestaShop on your server.
- Using an FTP client, upload all the files from the unzipped archive to your web server, in the desired location:
- If you want to integrate PrestaShop into the root of your domain (e.g.
http://myownshop.com/), upload all the files into the root directory of your web server. - If you want to have PrestaShop in its own subdirectory on your web site (e.g.
http://mywebsite.com/shop/orhttp://shop.mywebsite.com/), create the shop directory/sub-domain on your server and upload all the files into that directory.
- If you want to integrate PrestaShop into the root of your domain (e.g.
- Open the files' location in your browser; you should be redirected to the
/install/folder. - Using your MySQL access codes, follow the instructions from the installer's screens.
- Once installed, delete the
/install/folder and rename the/admin/folder into something unique to you (for instance,/4dm1n/) – if PrestaShop hasn't already done if automatically. - Check that everything works:
- Visit your website
- Connect to your back-office (the admin folder that you renamed), using the access codes you set during the installation process.
...
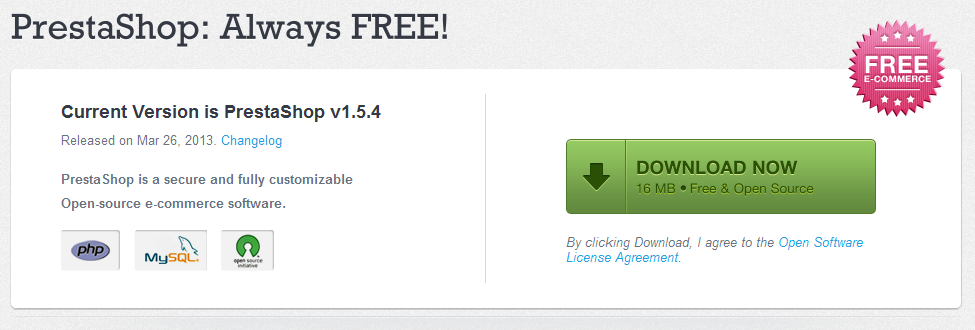
You can download the latest version of PrestaShop at http://www.prestashop.com/en/downloads. This page presents you with an informal form, which helps the PrestaShop team to better know its users. Whether you fill the form or not, click the "Download" button to display the download page.
You only have only one choice: the latest stable version, ready for all websites.
...
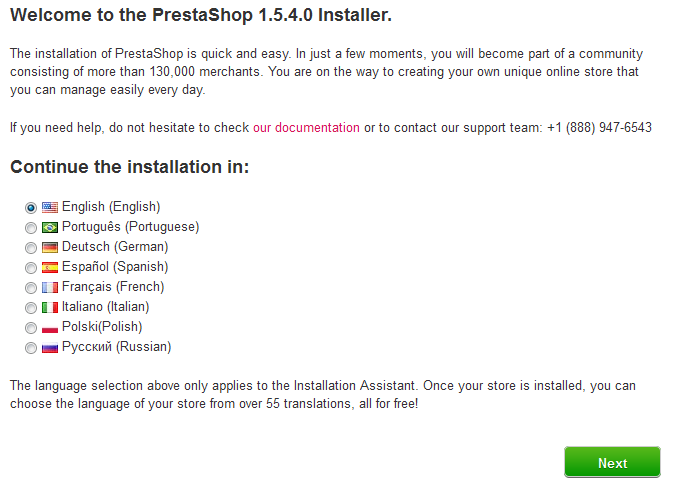
This page is a quick intro into the installation process. You can choose the language in which the installer will display its instructions.
You also get a link to the documentation site (http://doc.prestashop.com/), and the PrestaShop support phone number. You can learn more about our support service by going to http://support.prestashop.com/en/.
...
This second page is a simple requirement: PrestaShop is free and distributed under specific open-source licensea certain contract. You simply cannot use this software if you disagree with the terms of the licenselicenses, and this step requires you to explicitly acknowledge itthem.
Read PrestaShop's license, the licenses:
- Open Software License 3.0
...
- for PrestaShop itself, which you can also read
...
- at http://www.opensource.org/licenses/OSL-3.0.
- Academic Free License 3.0 for the modules and themes, which you can also read at http://opensource.org/licenses/AFL-3.0.
You must agree to the license licenses in order to install PrestaShop.
...
To access the next step, you must check the "I agree to the above terms and conditions" box, then click "Next". If you do not explicitly agree to the licenselicenses, you cannot install PrestaShop: the "Next" button will not even be clickable.
...
If something does go wrong during the server check that happens in the third step, the installer displays the "System compatibility" page, where you can see all the checks that were performed, with the failed one being marked in red.
System compatibility
This page checks that everything is OK with your server configuration: PHP settings, permissions on files and folders, third-party tools.
...
Here is a list of the checks that are performed during this third step:
| Check | How/where to fix it? |
|---|---|
| Is PHP 5.1.2 or later installed? | Web server |
| Can PrestaShop upload files? | php.ini (file_uploads) |
| Can PrestaShop create new files an and folders? | File browser / FTP client / command line |
| Is the GD Library installed? | php.ini (extension=php_gd2.so) |
| Is MySQL support is on? | php.ini (extension=php_pdo_mysql.so) |
| Recursive write permission on ~/config/ | File browser / FTP client / command line |
| Recursive write permission on ~/cache/ | File browser / FTP client / command line |
| Recursive write permission on ~/log/ | File browser / FTP client / command line |
| Recursive write permission on ~/img/ | File browser / FTP client / command line |
| Recursive write permission on ~/mails/ | File browser / FTP client / command line |
| Recursive write permission on ~/modules/ | File browser / FTP client / command line |
| Recursive write permission on ~/override/ | File browser / FTP client / command line |
| Recursive write permission on ~/themes/default/lang/ | File browser / FTP client / command line |
| Recursive write permission on ~/themes/default/pdf/lang/ | File browser / FTP client / command line |
| Recursive write permission on ~/themes/default/cache/ | File browser / FTP client / command line |
| Recursive write permission on ~/translations/ | File browser / FTP client / command line |
| Recursive write permission on ~/upload/ | File browser / FTP client / command line |
| Recursive write permission on ~/download/ | File browser / FTP client / command line |
| Recursive write permission on ~/sitemap.xml | File browser / FTP client / command line |
| Can PrestaShop open external URLs? | php.in (allow_url_fopen) |
| Is PHP's "register global" option off? | php.ini (register_globals) |
| Is GZIP compression activated? | .htaccess |
| Is the Mcrypt extension availablavailable? | php.ini (see http://php.net/manual/en/mcrypt.setup.php) |
| Is PHP's "magic quotes" option deactivated? | php.ini (magic_quotes_gpc) |
| Is the Dom extension loaded? | --enable-dom compile time option. |
| Is the PDO MySQL extension loaded? | php.ini (extension=php_pdo_mysql.so) |
| Anchor | ||||
|---|---|---|---|---|
|
...
| Warning |
|---|
Some hosts might require you to use CHMOD 777, although it is not recommended for anything more than a one-time need. |
...
Click "Next" to continue.
Step
...
5: Shop configuration
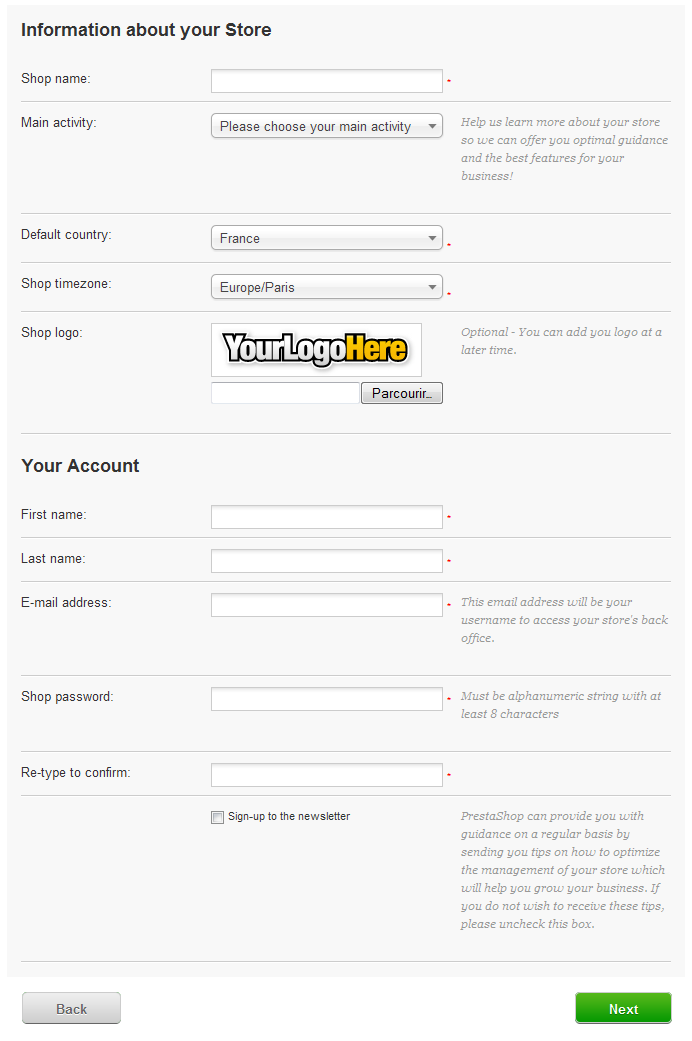
This is where you can start customizing your shop: give it a name and a logo, indicate its main activity, and indicate the personal information for the shop owner (which has legal binding in most countries)...
| Warning |
|---|
Do not use a colon in your store's name, as it might prevent some feature from working (for instance, e-mail sending might fail. You can replace the colon with a dash if you need to have two sections in the title. For instance, use "MyStore – The best place for items to buy" instead of "MyStore: The best place for items to buy". |
| Info |
|---|
Until version 1.5.3, you could choose to install a handful of demo products, or start with a clean slate. Since version 1.5.4, these demo products are installed by default. This is great if you are discovering PrestaShop, as it helps you learn how to use the various features... and it can of course serve as a good basis for your own shop, after removing the demo products and categories! |
...
Click "Next", and the installer will start filling the database with tables and data, and updating the configuration files. This might take a few minutes in a slow server.
The installer does the following:
Create the
settings.inc.phpfile, and fill it with your settings.Create the database tables.
Create the default shop with its default languages.
Populate the database tables.
Configure the shop's information.
Install the default modules.
Install the demonstration data (products, categories, user, CMS pages, etc.).
Install the theme.
Once it is done, your shop is installed and ready to be configured!
...
An easy way to improve your installation's security is to delete or rename some key files and folders. This is done using your FTP client, directly on the server.
...
- The "install" folder (imperative).
- The "docs" folder (optional).
- The "README.md" file (optional).
Item to rename:
...
| Info |
|---|
Until version 1.5.3, you had to also rename the "admin" folder |
...
and give it a unique name, so that no attacker |
...
could access your |
...
administration area. For instance, "admin42", "secretFolder" or "xyz123" – anything unique to you. Since version 1.5.4, PrestaShop takes care of renaming the administration folder for you: it becomes the word "admin" followed by 4 random digits, i.e "admin8814". The renaming happens as soon as you reach the "admin" folder for the first time: PrestaShop renames it, then correctly accesses the renamed folder. |
Click on the "Manage your store" button in order to be taken to your administration area.
Write down the new name for your "admin" folder, because from now on you will access your administration pages using this address.
...
Log in to the PrestaShop back-office by going to your newly-renamed "admin" folder, and start filling out your product catalog with products, adding carriers and shipping costs, adding manufacturers and suppliers, changing the theme, and generally configuring the many settings to suit your tastes and needs. See the user guide's "First steps with PrestaShop 1.5" chapter for more information: http://doc.prestashop.com/display/PS15/First+steps+with+PrestaShop+1.5.
| Tip |
|---|
You should regularly back up your database and files, ideally on different computersmore than one computer, in case of problems related to hardware or security. |


