Managing Product Features
Features are a product's intrinsic characteristic: they remain the same throughout the product's variations (or "combinations").
You should think of features the same way you think of product attributes (see above), with the notable difference that you cannot create product variations based on features.
...
Features are configured on a per-product basis, from the "Product" page under the "Catalog" menu, but they must first be registered on your shop using the tool on the "Features" page under the "Catalog" menu.
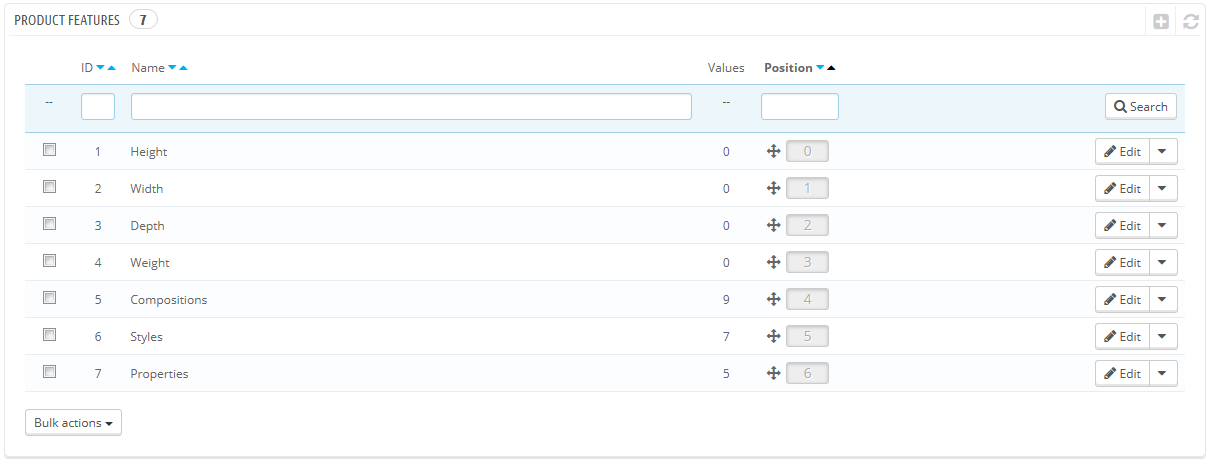
You can set the features' order using the arrows in the "Position" column.
The "Actions" column gives an Edit iconaction, a Delete icon action and a "+" icon View action which you can click to display the available values for this feature. From there, you can sort, edit and delete values if you need to.
Adding a feature
Click on "Add new feature". A very simple form appears. This is where you name the feature itself: for example, the types of headphones provided with a music player.
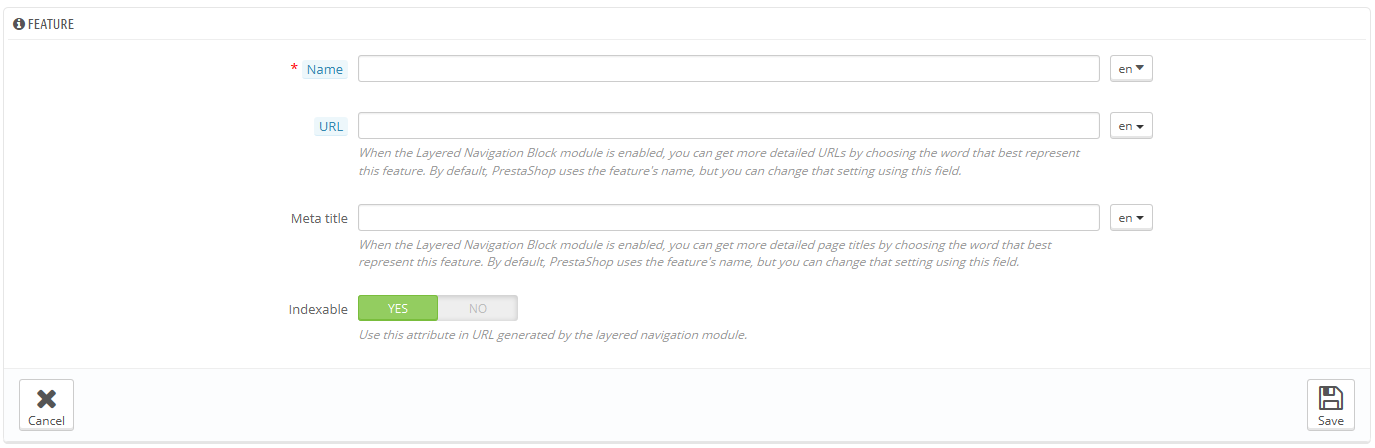
Give a name to this new feature, and save your new feature to return to the attributes list, then click on .
| Info |
|---|
Three more options are available when you enable the Layered Navigation Block module. They are not strictly tied to the layered navigation: they provide a direct URL to each of a product's variations. This way, not only is the customer able to send a correct link to a friend, but this also helps enhance your search engine placement. The layered navigation generator does make use of these.
The customer can get the URL simply by clicking on an attribute from the product sheet: the URL will change to add a final detail, for instance |
Adding a value to a feature
Click on "Add new feature value". Another page form appears.
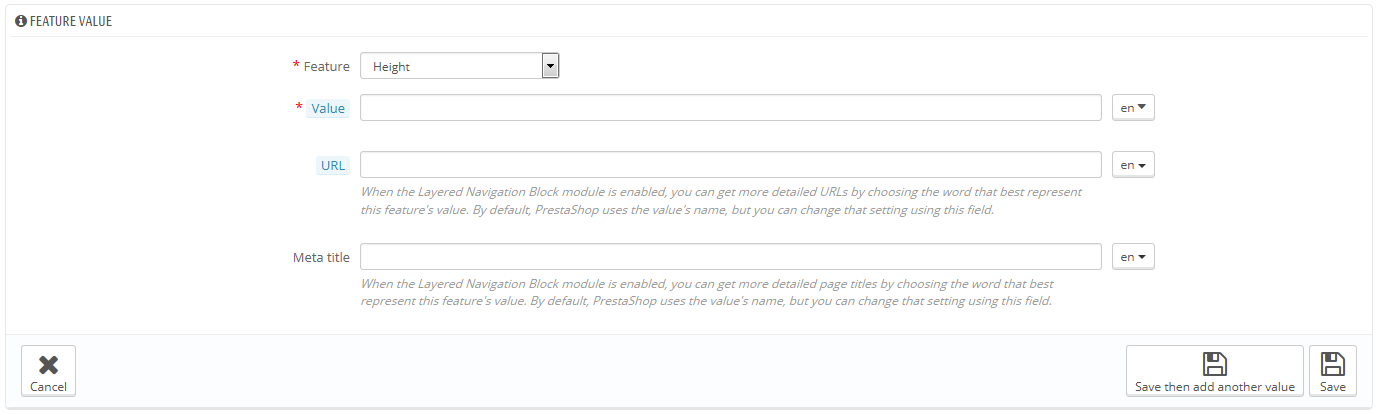
Fill out the form:
- Feature. From the dropdown list, select one of the available features.
- Value. Give a value to the attribute: "5 lbs", "27 cm", etc.
..
...
.and save your feature value. You can add more values for the same feature type by saving your changes with the "Save and add another value" button.The main list eventually presents you with all your registered features. You can edit or delete each using the buttons on the right of the table, or display their values by clicking on the "+" icon, which opens a sub-table.
You can also set the features presentation order on the front-office either by clicking on the arrow icons, or by drag'n'dropping each row when the mouse cursor indicates you can
| Info |
|---|
Two more options are available when you enable the Layered Navigation Block module. They are not strictly tied to the layered navigation: they provide a direct URL to each of a product's variations. This way, not only is the customer able to send a correct link to a friend, but this also helps enhance your search engine placement. The layered navigation generator does make use of these.
The customer can get the URL simply by clicking on an attribute from the product sheet: the URL will change to add a final detail, for instance |