...
The "Positions" page displays all the available hooks and their attached modules. Many are empty by default, but some of the most useful ones can have a dozen of modules.
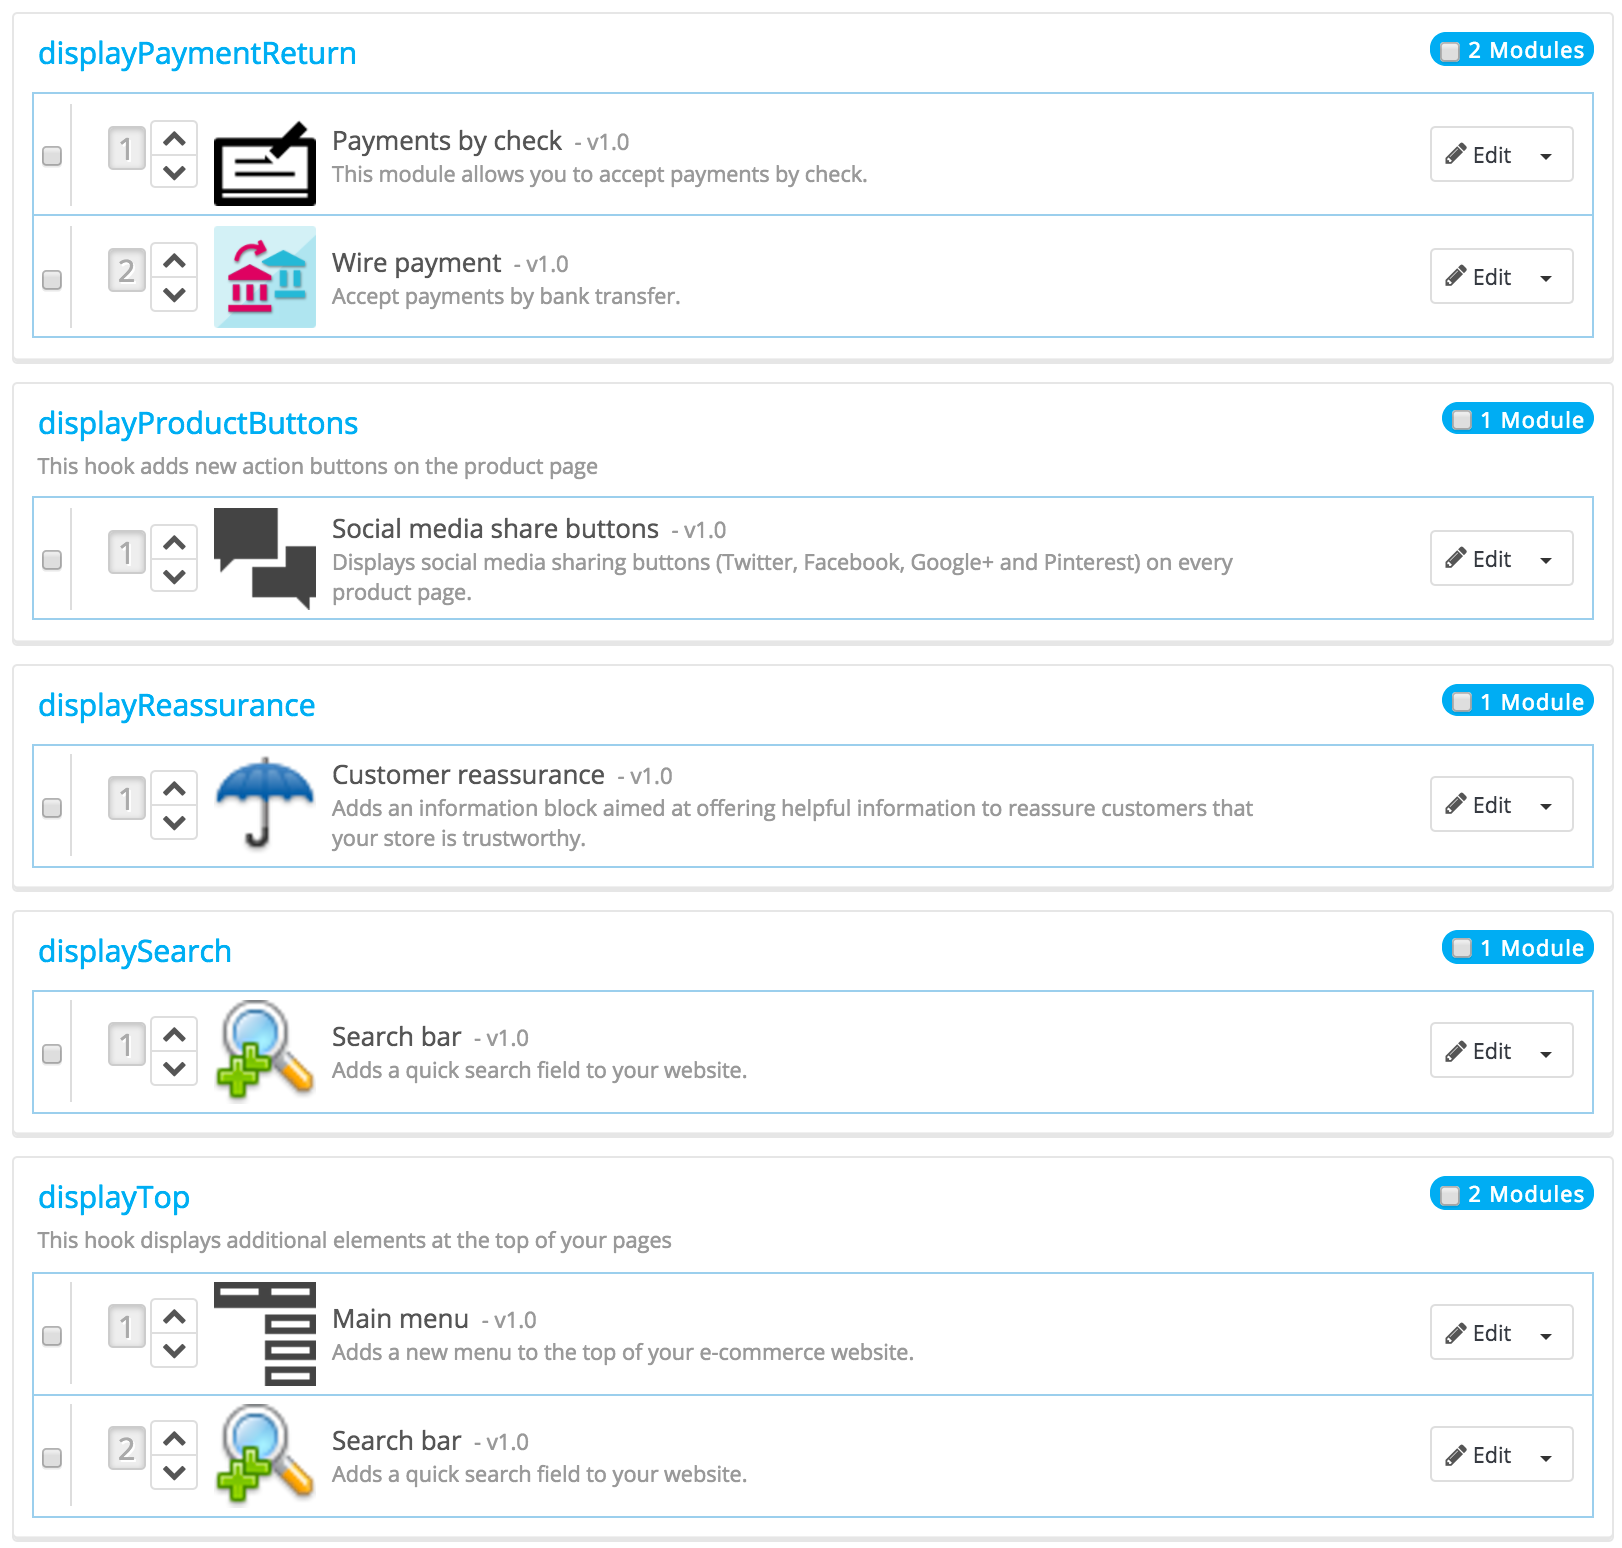
At the top of the page, a drop-down menu enables you to only display the module in which you are interested. Alternatively, you can also search for a specific hook.
By default, this page only displays the hooks on which you can position functions. Checking the "Display non-positionable hooks" box below displays all the hooks, even the invisible ones, that are linked to an action for an instance.
...
- Go to the "Design" menu, and its "Positions" page.
- Click the "Transplant a module" button at the top right. The transplanting interface appears.
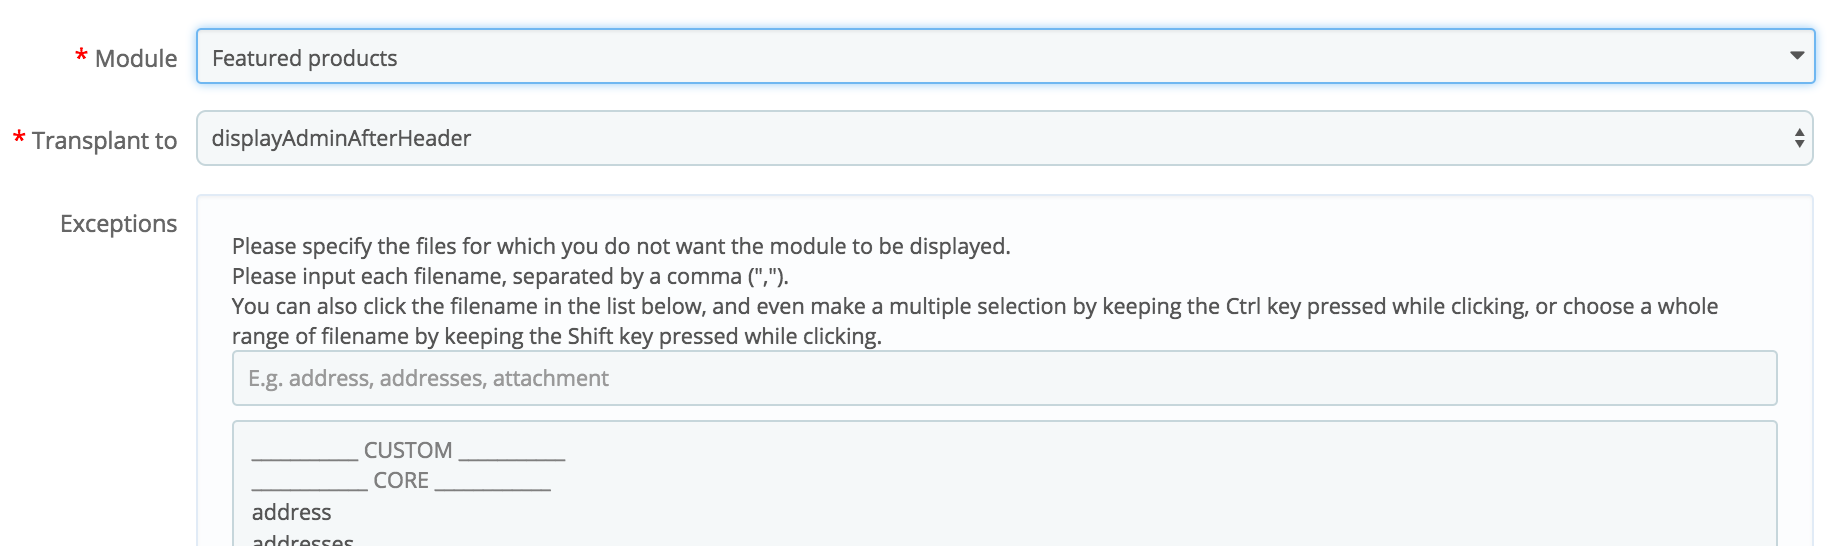
- In the "Module" drop-down list, select the module you want to transplant.
- In the "Transplant to" drop-down list, select where you want to transplant the module to. There are many hooks available. You can change your settings later if needed.
- In the "Exceptions" field, type the name of the file(s) of the pages in which you do not want the module to appear.
You can perform multiple selections simply by clicking on the file names while keeping the Ctrl key pressed. You can deselect files in the same manner: Ctrl+click. - Do not forget to save your changes.
![]()
The "Transplant to" drop-down menu gives you a good idea where modules can be placed.
...
Editing a module's setting uses the same interface as the one used for transplanting a module. The only difference is that you cannot change the "Module" field, as it is disabled, and thus grayed out. You can edit both the "Transplant to" setting and the exceptions, which works just as described in the "Attaching a module to a hook" method above.
Always check your front-office to make sure the module is indeed where you intended it to be.
...